let's talk crafts - nikki in stitches Pull Up A Chair…Let’s Talk Crafts!

I complained to my husband this morning that I had writer’s block, and desperately needed inspiration for this week’s post.

Two things to note here:

1. It’s not that I’m not crafting. I actually have more projects in the works than ever before, it’s just that none are really ready to make an appearance yet here on the blog. (You should see my work table!)

2. I’m also very distracted these days (you know…with a new baby set to arrive in T-5 weeks!), so sitting down to concentrate on writing isn’t the easiest thing to do.

Well, leave it to my sweet husband to give me the kick in the behind I needed with his response of “Nikki, there’s no such thing as writer’s block! You’ve never had talker’s block, have you? If your readers were sitting right here at this table drinking coffee with you, you ‘d be able to chat crafts for days.”

And, he’s right.

We’d laugh and share stories.

We’d exchange ideas, techniques, and favorites places to find inspiration.

We’d tell tales of crafts gone wrong.

And the entire time we wouldn’t be searching for topics to discuss…it would just come naturally!

So, let’s do it!

Today I’m throwing out three short ideas, call them “mini-blog-posts” if you will, providing inspiration for our crafty talk, and feel free to comment away!

Throw in your own two cents!

Agree or disagree…say whatever you feel!

Reply to other people’s comments and ideas!

Let’s just chat!

And who knows?

Maybe this will turn into a regular event!

Enjoy,

Nikki, In Stitches

Note: I know there are a lot of you that read this through your inbox. To make it easier to comment, just click here, and you’ll be taken right to this exact post on the Nikki, In Stitches site! From there, comment away!

1. I thought I hated the color purple.

I was asked to make a few custom cuffs for a boutique that carries my accessory line..all of which needed to be purple. So, of course, I looked to my fabric stash that literally contains hundreds and hundreds of prints in all colors of the rainbow…only to find 4 (yes, just FOUR!) purple fabrics, none of which I liked enough to make work.

Then I went online to search for fabrics (See “mini-blog-post” #3 below) and found two. Yup, I could only find TWO that I liked.

I was convinced it was my hatred for the color purple that was blocking me from finding fabric that worked.

Fast forward a few days, the fabric arrived, I got to work on the cuffs…and I fell in love!

I absolutely love how they turned out (that’s them in the picture above!), and have even made myself one…in purple!

What colors are missing from your stash? Which ones do you have to force yourself to work with? Is there a color you steer clear of?

2. Pinterest Problems.

I am in a love/hate relationship with Pinterest.

Sometimes (when I can put in a search term and get hundreds of great ideas that I love in return) I love it.

However, when I can’t find anything there that I like, I get frustrated…fast.

And to make matters worse, I get so upset when people don’t pin the link that accompanies the project. You end up just at an uploaded picture page, and then have to search the site for the project you’re looking for.

Please pin appropriately, people!

Do you pin? How much time do you spend pinning? Be honest! We promise not to judge!

3. I want to be addicted to online shopping.

Online shopping is so hard for me.

I’m more of a “touch and feel, compare tones, get a good idea of scale” kind of person…all of which is hard to do just by looking at a tiny picture on my computer screen.

And it’s not just fabric that is my issue.

I’m making wedding invitations for my sister-in-law right now, and I couldn’t even order the paper online without seeing it first.

I’m that annoying person that always requests samples first.

Yes, it slows the entire process down, makes no financial sense, and is frustrating for the company I’m contacting, but I just can’t do it.

I need to actually see, feel, and compare before buying.

Can you shop online for fabrics, papers, etc. that you haven’t yet seen in person? Is this really something I should be complaining about? I mean…my wallet is probably thankful that I have this issue, right?

PS…This gently push in the right direction from my husband apparently was inspired by this post he read of Seth Godin’s. Although I’d like to thank my hubby for inspiring this post, I can’t give him all the credit. ♥


Posted in Blog | Tagged , , , , , , , | 52 Comments

july-promo-40-off-7-31 Silhouette Surprise Sale…Including All The New Materials Debuting This Week At CHA! {And A Portrait Giveaway!}

We interrupt our regularly scheduled programming….

No project or tutorial to post today, but I’m still so excited about the details below.

In full disclosure, this is a Silhouette-based post, so if you aren’t a Silhouette lover, I won’t be upset if you stop reading now and join me next week when I return to my “regularly scheduled programming.” But if you are a Silhouette owner (or you are someone that wants to be!) you won’t want to miss a single word below!

Ready for the fun?

Silhouette is having a HUGE SURPRISE SALE!

All supplies are 40% off!

Here’s what’s included:
1. All your favorites. Vinyl, HTV, ink, adhesive backed cardstocks, double-sided adhesive (you know, the stuff that makes glittering intricate designs a piece of cake!)you name it!


2. Your much needed supply staples. Now is the best time to pick up a new cutting mat and blade!


3. ALL THE NEW MATERIALS SILHOUETTE IS DEBUTING THIS WEEK AT CHA! (This is the one I think I’m most excited about!) I’ve got a sneak peek below at some of the new goodies Silhouette will premiere this week at CHA’s Craft & Hobby Association Trade Show, and all of them are currently on sale….for 40% off!

(Actual cutting systems, downloads, download cards, subscriptions and gift cards are the only things not included in the sale. The discount is for supplies…all physical things that you can run through your machine, add to your projects, etc.!)

Pretty exciting stuff, right?

Now, I know some of you will have questions about the new materials, and I have yet to play with all of them. To make things easier, this entire week, Silhouette will be featuring these new items on their blog, answering all of your questions, and demonstrating how these products can be used. Be sure to stop by their blog and take a peek at all the great, creative ideas they have!

Ready for the sale details?

It’s an easy one this month. All you need is coupon code STITCHES to get 40% off all the supplies in your cart! The sale runs from today through July 31st!

Click here to get shopping!

Don’t forget, below I’ve got pictures and details of some of the new products launching this week. Pay extra attention to the stamp starter kit. Yes, Silhouette now has a material that you can cut with your CAMEO or Portrait to make your own rubber stamps! I’ve already got that one in my cart, ready to order!

But wait! There’s more!

Remember at the top of this post, I said “if you want to be a Silhouette owner” this post is for you?

Silhouette has given me a Portrait to giveaway!

Most of you know the drill by now, but just in case…here are the details:

Entering the Silhouette Portrait™ giveaway is easy! Just use the Rafflecopter app below. This giveaway is open to US residents only! (If you’re viewing this post in your email or through an email reader and can’t see the Rafflecopter box below, click here to be taken directly to the Nikki, In Stitches site.)
a Rafflecopter giveaway

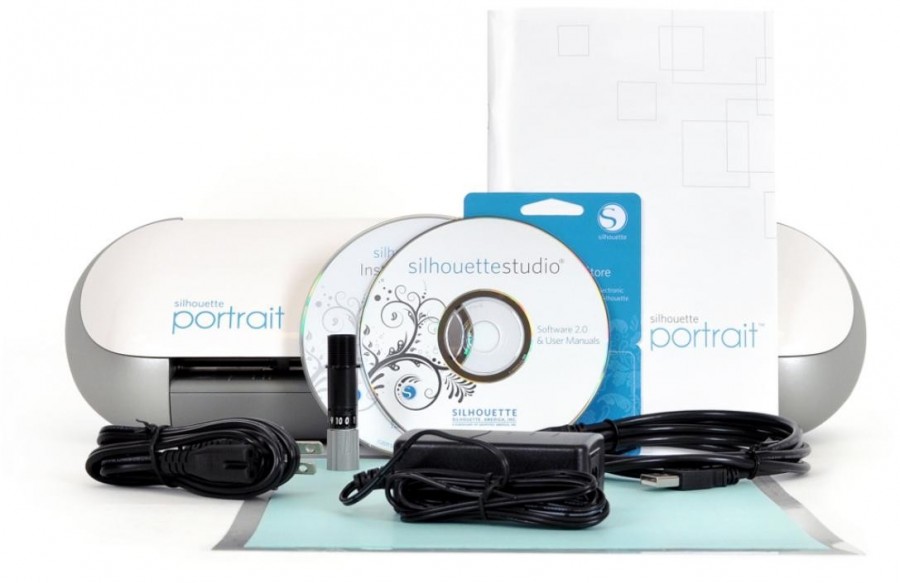
Here is exactly what the winner will receive:

  • Silhouette Portrait™ electronic cutting tool
  • Silhouette Studio® software
  • 50 exclusive cuttable designs
  • Power cable, USB cable
  • 8″ cutting mat
  • Cutting blade
  • $10 gift card to the Silhouette Online Store
  • Basic Instruction Guide

PLUS, I’m adding in my Intro To Your CAMEO class for free!

Good luck in the giveaway and Happy Shopping!

Nikki, In Stitches

Here’s that sneak peek I mentioned at what’s debuting this week from Silhouette!

Find these new products, a few others, plus all of your old favorites here!

And don’t forget to use promo code STITCHES to get them 40% off!

Posted in Blog | Tagged , , , , , | 29 Comments

3 Tips For Getting Started In Hand Stamped Jewelry Guest Post for Cousin Corp Picture 3 Tips For Getting Started Making Hand Stamped Jewelry {A Guest Post For Cousin Corporation}

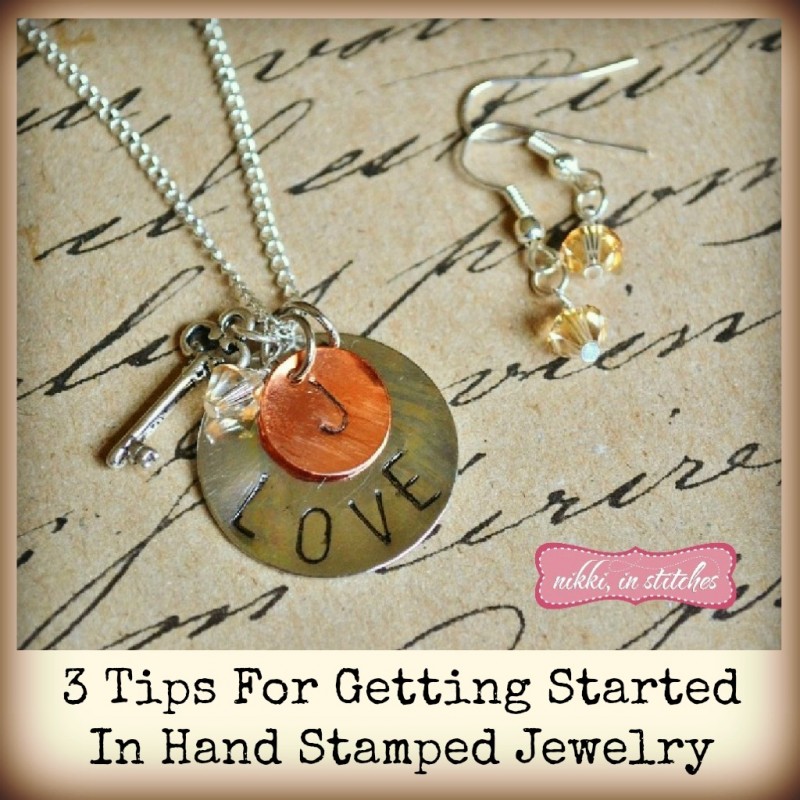
I’m lucky enough to have a few pieces of hand stamped jewelry and they are my favorite to wear.

I’m not sure what I love most about them.

It could be that they are personalized to fit my exact style. It could be that they are casual enough to wear every day but can also work well with my dressier wardrobe options. Or maybe it’s because they represent me, and what’s most important in my life, and just putting them on, reminds of how very much I love my family.

My favorite necklace has a key charm, a heart with my husbands initial stamped on it, a charm for each of my children with their names stamped on it, a Swarovski crystal representing each of their birthstones, and a pearl and bird charm that represent my grandmother, who passed away last year. See what I mean? What else could so genuinely represent all that I hold so close to my heart?

Creating these hand stamped pieces is special. Whether you’re keeping your jewelry for yourself, or giving it as a gift, it is something that immediately becomes a treasure. But jumping into hand stamped jewelry can be somewhat intimidating, and costly.

Today I’m guest posting for Cousin Corporation, giving my three tips for getting started with hand stamped jewelry. Click here to take a peek at my suggestions and advice for where and how to begin!

And welcome to the world of hand stamped jewelry…You are about to fall in love.

Nikki, In Stitches

Posted in Blog | Tagged , , , , | 4 Comments

How To Open and Edit svg Files With Your Silhouette CAMEO or Portrait by Nikki In Stitches How To Open And Edit .svg Files With Your Silhouette Cutting System

Today’s topic of conversation: .svg files.

And no, this is not a “tech” post, but it is this month’s Silhouette tutorial, so if you’re not a Silhouette CAMEO or Portrait owner, I won’t be upset if you stop reading now. If, however, you are a Silhouette cutting system owner, or would like to be soon, you may want to keep reading… .svg files can bring a lot of fun to your projects!

Back to those files…

Until I bought my Silhouette CAMEO, I did not know what .svg files were, and I imagine many of you don’t know either.

So, .svg files are Scalable Vector Graphics. (See where the svg comes from?)

Simply put, it’s a format for some graphic design files.

And why are these important to us Silhouette owning crafters?

Because we’d like to be able to use these in our projects, right?

Good news and bad news coming your way.

Bad news: The software that comes free with your Silhouette cutting system can not open .svg files.

Good news: The Silhouette Studio® Designer Edition software (that DOES allow you to open and manipulate .svg files!) is on sale this month!

Aside from everything that the basic Silhouette Studio software has to offer, the Silhouette Studio® Designer Edition also includes:

  • The ability to open, manipulate, and cut .svg files
  • Rhinestone tools to convert designs into rhinestone templates and create your own rhinestone designs
  • Sketch tools to convert designs into several styles of sketchable art
  • Creative knife tools to allow you to clip designs using different patterns
  • An enhanced eraser set to modify designs with more precision
  • A built-in ruler and guide lines for precise alignment and drawing

And of all of these, for many of you, the ability to cut .svg files is probably the most interesting. It might not sound like a big deal, but most of the files you see offered as freebies and “designs of the day” are in this format, so to be able to not only cut them, but also manipulate them to fit your project, makes this added feature kind of a deal breaker.

There are a ton of sites that offer free .svg files. (Some of them will even send one to your inbox every morning!) A quick google search will give you some of the most popular. I chose SVGCuts.com today to feature, just because I loved this little hot air balloon so much, and I thought it was a generic enough design that many of you would get use out of it. Below you’ll find a video demonstrating exactly how to open and manipulate an .svg file. The same steps can be applied to any .svg file you’d like to work with!

If you’d like to pick up the hot air balloon file for yourself, you can find it here: http://svgcuts.com/blog/2013/06/15/hot-air-balloon-svg/

And if you’re reading this post in your inbox, and can’t see the video, click here to be taken right to the Nikki, In Stitches site!

And now for the sale details!


As you can see from the picture above, both cutting systems are on sale this month from Silhouette. Both come bundled with the Silhouette Studio® Designer Edition Software.

The software alone is also on sale!

Ready to start shopping?

Head over to the Silhouette site and get going!

And be sure to use promo code STITCHES to get your discount!

Remember, the following three things are on sale this month:

  • Silhouette Studio® Designer Edition Software (MSRP $49.99) on sale for $24.99
  • Silhouette Portrait™ with Silhouette Studio® Designer Edition Software (MSRP $249.98) on sale for $129.99
  • Silhouette Cameo® with Silhouette Studio® Designer Edition Software (MSRP $348.98) on sale for $269.99

This offer is only good from 7/1/13 to 7/10/13!

Click here to start shopping!

Posted in Blog | Tagged , , , | 14 Comments

nikki in stitches - a handmade holiday ebook - 50 percent off halfway to christmas sale Halfway to Christmas Half-Off Sale!


Are you sitting down?

You should sit down.

I don’t want to upset you.

And if you’re sitting down I’d feel better about telling you this.

Are you ready?

Do you see today’s date?

It’s June 25th.

You know what that means, right?

Please sit down.

It means we’re half-way to Christmas!

See?

(Good thing you were sitting down.)

I know.

Where did the last six months go?

Didn’t we just take down the holiday decorations like a month ago?

We are exactly half way to the big day once again.

(Deep breath.)

I’ve got a little something to make this news a bit easier on you.

Since we’re half-way to Christmas, I’m having a half-off sale.

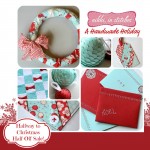
Nikki, In Stitches - A Handmade Holiday EBook is 50% off today only.

It’s an instantly downloadable file, that includes simple tutorials for project such as:

*Accents for your home
*Ornaments for the tree
*Gifts for family and friends
*Projects to make with your children
*And more!

Feeling better?

Good.

Now, let’s get crafting! You’ve only got 24 hours to grab your copy at 50% off!

PS…That means you get the file, plus all the goodies inside, full picture tutorials, templates, etc. for just $3.50.

Merry Halfway To Christmas!

Nikki, In Stitches


Posted in Blog | Tagged , , , , , , , , , | Leave a comment

nikki in stitches - how to use freezer paper to create your own fabric stencils How To Use Freezer Paper To Make Fabric Stencils

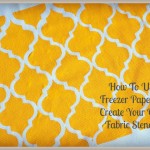
Using freezer paper as a fabric stencil is nothing new, and I certainly don’t claim that this my original idea. In fact my fellow Silhouette guest blogger last month (Jessica from Mom 4 Real) included a freezer paper how-to as part of her project there. But after my heat transfer wall art post a few weeks ago, so many of you had questions about the technique that I thought I’d share exactly how I do it.

Just to refresh your memory, in the wall art project, I mentioned that my background fabric started off as a plain white napkin. I then painted it, using freezer paper as my stencil, to create the quatrefoil design.

I used my Silhouette cutting system, but you can certainly cut your designs with scissors or a craft knife. Once the stencil is cut, the rest of the how-to is exactly the same.

Let’s get started!

Enjoy,

Nikki, In Stitches

1. Cut your stencil from your freezer paper. Freezer paper has a shiny side and more of a “paper” side. You want to have the paper side up when working, shiny side down. If you’re going to make your stencil by hand, you can draw your design on the paper side, then cut it out with either scissors or a craft knife. If you’re using a cutting system, put the freezer paper on a cutting mat, again shiny side down, and send it through your machine! After your stencil is cut, remove the negative space!

2. Place your stencil on your fabric where ever you’d like it, shiny side down, and press it in place. A straight up and down motion with your iron is best. If you slide your iron over the top you risk moving your stencil. You only need to press it for a few seconds, and it should stay put. If by chance it moves on you, or you decide it’s not centered or needs to be moved, you can peel it up, and then press it down again. The freezer paper will adhere to your fabric as many times as you need it to.

3. Paint your fabric just as you would any stencil. A sponge brush is best, and again, an up and down motion will reduce the chance of any paint bleeding through your stencil. (Note: You may want to paint on an old cardboard box or put newspaper down first. The paint does tend to go through your fabric, and you don’t want to damage your work table underneath!)

4. Peel off your freezer paper stencil! I compromise here from what a lot of people recommend. Some say let it dry completely. (I worry about the paint peeling up off the fabric, especially if you’ve got spots where it was applied on the thick side.) Some say peel it up when the paint is still wet. (I worry about my paint smearing!) So I say, wait until your paint is tacky to the touch, then peel up your stencil! Let it dry the rest of the way before you work with it more!

Posted in Blog, Fabric | Tagged , , , , , , , | 2 Comments

nikki in stitches bias tape tutorial - do you make your own bias tape Do You Make Your Own Bias Tape?

Making your own bias tape….

This is a “no-brainer” for some of you.

And for some of you, you are perfectly happy buying it pre-made.

But after my Applique Baby Bib post, I did get a few people asking questions, so here are responses to your FAQ’s, plus a quick how-to for making your own!

Q1: What exactly does “on the bias” mean?
A: Cutting fabric “on the bias” means to cut it on a diagonal. Let’s use quilting as an example. Typically, you cut your strips for quilting with the grain of your fabric. Your cuts either go from selvage to selvage or parallel to a selvage edge. When you cut on the bias, you’re literally going to cut on a 45 degree angle. Yes, it’s going to eat up more fabric, but it’s necessary in order for your finished bias tape to curve around the edges of your work.

Q2: Why would you want to make your own bias tape when it is so easily found in your craft store, and isn’t very expensive at all?

A: Sometime I do buy it! If I just need a solid color and I can find a perfect match, I do often just pick it up at the craft store. However, if I’d like a print (as in the applique baby bib post) then I make it myself.

Q3: Can’t you buy bias tape makers at the craft store?
A: Yup! You sure can! And by all means, go right ahead and pick one up! For me though, as soon as I buy a 1/4″ bias tape maker, I’m going to need a 1/2″ bias tape maker. Then a 3/8″. Then a 5/8″. Get the picture? By making your own from scratch, you aren’t restricted to any size!

Q5: What if I need a piece longer than my fabric is wide? What’s the best way to piece my strips together?
A: Now we’re ready for the step-by-step how-to!

1. Cut your strips 4 times wider than you’d like your finished bias tape to be. For example, if you’d like 1/2″ wide bias tape, cut your strips 2″ wide. If you’d like 1/4″ wide bias tape, cut your strips 1″ wide. Then be sure you trim off the short selvage edge from each end!

*If you’re going to need a length of bias tape longer than your fabric is wide, i.e. longer than 40″ inches long, you’ll need to piece two or more strips together. The best way to do this is also sew them on a 45 degree angle. Follow the steps below. If one strip of fabric will be enough for your project, skip down to step #4!

2. At one end of each strip, draw a diagonal line on the back of the fabric. Use the 45 degree line on your ruler as a guide. With right side together, place the ends of two strips perpendicular to each other (as shown in the picture below).

3. Sew on the drawn line. Cut away the excess fabric by cutting 1/4″ out from the sewn line. Press your seams open. Continue as many times as necessary, until you have a long enough pieced strip for your project.

4. Press your fabric strip in half longways, wrong sides together.

5. Open your fabric back up and now press the long edges in to the crease you made in Step 4. Again, wrong sides together, right side facing you.

6. Fold your fabric back in half on the line you originally pressed!

It’s that easy!

And now you’ve got perfectly matched bias tape for your next project!

Enjoy,

Nikki, In Stitches

Posted in Blog, Fabric, Latest How-To's | Tagged , , , , , , , | 1 Comment

nikki in stitches heat transfer wall art tutorial Heat Transfer Wall Art Tutorial

Chevron is out and quatrefoil is in…at least here in my corner of the crafty world!

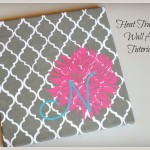
I’m loving this simple wall art I created for my office using heat transfer materials. In fact, I love it so much I’m already making more. If you’re a friend of mine with a birthday coming any time soon, don’t be surprised if you find one of these wrapped up and tagged from me!

The how-to is below, but just a few notes first:

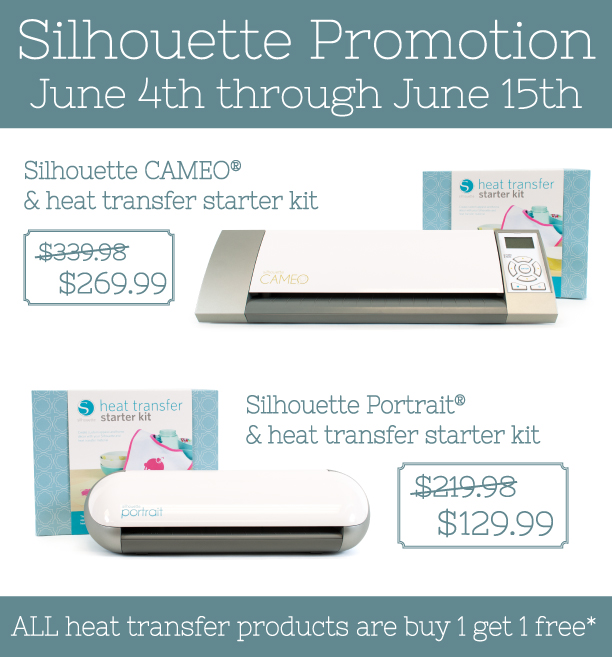
1. The piece was made using heat transfer materials from Silhouette, which are their featured products this month.

2. As usual, machines bundled with heat transfer materials (in this case, Silhouette’s heat transfer starter kit) are on sale.

3. ALL HEAT TRANSFER MATERIALS FROM SILHOUETTE ARE BUY ONE GET ONE FREE! You know I’m stocking up on all my favorite colors! And this includes printable heat transfer material!

So if you’d like to get shopping right away, head over to this page on the Silhouette site and use promo code STITCHES to get your discount.

More details on the sale are also at the bottom of this post, after the wall art how-to!

Oh! Did I forget to mention there’s a giveaway at the end of this post, too? Yup! There’s a Silhouette Portrait™ up for grabs! GOOD LUCK!!!

Enjoy,

Nikki, In Stitches

Materials:

  • Blank canvas
  • Washi tape or any other “not too sticky” kind of tape to use just for marking
  • 16″ square piece of fabric
  • Silhouette heat transfer material - 2 colors
  • Silhouette cutting system
  • Spray adhesive
  • Staple gun and staples

Directions:
Just a tip here before we get started! You can use any type of background fabric you like. The only restriction is that Silhouette heat transfer material does not adhere to nylon. Any other type of fabric, and you’re good to go!

What makes me love this project even a bit more, is that the background fabric I used, was actually just a plain old white cloth napkin I picked up from Target. I found a pack of 12 for I think $9. I created a stencil (yes, with my CAMEO) and just painted the quatrefoil design on it! When you can’t find the perfect fabric to use for a project…make it yourself!

1. Find the center of your background fabric. Use washi tape to mark out exactly how big your canvas is. This will give you a better idea of the placement of each of your pieces.

2. Following the directions provided by Silhouette, cut your first design and adhere it to your fabric. (My first layer was a flower that you can find here in the Silhouette Online Store! It took some patience to weed, but was totally worth it!)


A few notes here:
*Silhouette has a few great video tutorials that answer any questions you may have about cutting and adhering your heat transfer materials. You can find them here:
Smooth Heat Transfer Video Tutorial From Silhouette

Flocked Heat Transfer Video Tutorial From Silhouette

Printable Heat Transfer Video Tutorial From Silhouette (For Dark Colored Fabrics)

Printable Heat Transfer Video Tutorial From Silhouette (For Light Colored Fabrics)

*Practice first! Definitely cut a small shape (something simple like a circle or a single letter) and do a dry run of adhering your design to your fabric. It will save you a lot of stress…and unfortunately I know this from experience. My iron must run a lot hotter than it says it does, because I burned my first heat transfer design. After some playing, I realized I didn’t need to heat set each piece for quite as long as Silhouette recommends, but like I said…I learned the hard way!


*Don’t forget to mirror your image! Especially if your design incorporates text! To mirror the image, select your design. Go up to the top of left nav bar in the Silhouette software. Select “Object,” then “Transform,” and then “Mirror Options.” From there, a sidebar will appear on the right of your screen. Select “Mirror Right.” A new, mirrored image of your design will appear. Delete the original! Cut the mirrored design!

3. Continue adhering the remainder of your designs, again following the directions provided by Silhouette. (My second layer was simply the letter N in the Sacramento font. The Sacramento font does not come in your Silhouette software, but you can find it online for free and just download it from there!)

4. Adhere your fabric to your blank canvas. First spray the canvas front with spray adhesive. Then use the washi tape to align the center of your fabric on the canvas. Once you have it in place, and any wrinkles smoothed out, wrap the fabric around to the back of the canvas, and use a staple gun to keep it in place.

It really is a simple project, right? And the possibilities are endless. You could do a really big canvas with a saying on it. You could do a cluster of smaller canvasses that kind of fit together to make one large design. You could do a set for your family…one canvas per person, a silhouette of them in the center, their first initial in the corner.

I like each of these ideas better than the last!

So who’s ready for sale details?

All heat transfer materials are Buy One Get One Free with promo code STITCHES.

For every Silhouette heat transfer product you buy, you can get another one (of equal or lesser value) free. This offer includes smooth and flocked heat transfer material, printable heat transfer material, and the heat transfer starter kit. Plus, you can mix-and-match however you like!

Silhouette Portrait™ Heat Transfer Starter Bundle: $129.99 (MSRP: $219.98)

Bundle includes:

  • Silhouette Portrait™ electronic cutting tool
  • Power cable/AC adapter
  • USB cable
  • Silhouette Studio® software
  • $10 download card
  • 8 in x 12 in cutting mat
  • Silhouette blade
  • Basic Instruction Guide
  • Portrait instructional DVD
  • Heat transfer starter kit:
    -3 sheets of smooth heat transfer material (9 in x 12 in of black, teal, dark pink)
    -2 sheets of flocked heat transfer material (9 in x 12 in of white and yellow)
    -Silhouette hooK
    -Exclusive download card good for 10 heat transfer designs
    -Idea booklet and instruction guide
    -Heat Transfer Instructional DVD

Silhouette CAMEO® Heat Transfer Starter Bundle: $269.99 (MSRP: $339.98)

Bundle includes:

  • Silhouette CAMEOSilhouette®
  • CAMEO® electronic cutting tool Power cable/AC adapter
  • USB cable
  • Silhouette Studio® software
  • $10 download card
  • 12 in x 12 in cutting mat
  • Silhouette blade
  • Basic Instruction Guide
  • CAMEO instructional DVD
  • Heat transfer starter kit:
    -3 sheets of smooth heat transfer material (9 in x 12 in of black, teal, dark pink)
    -2 sheets of flocked heat transfer material (9 in x 12 in of white and yellow)
    -Silhouette hooK
    -Exclusive download card good for 10 heat transfer designs
    -Idea booklet and instruction guide
    -Heat Transfer Instructional DVD

Ready to start shopping?

Click here to head over to the Silhouette site and get going!

And be sure to use promo code STITCHES to get your discount!

This offer is only good from 4/4/13 to 6/15/13!

And for those of you looking for the giveaway….here you go!!

Entering the giveaway couldn’t be easier! Just use the Rafflecopter app below. This giveaway is open to US residents only! (If you’re viewing this post in your email or through an email reader and can’t see the Rafflecopter box below, click here to be taken directly to the Nikki, In Stitches site.)

Here is exactly what the winner will receive:

  • Silhouette Portrait™ electronic cutting tool
  • Silhouette Studio® software
  • 50 exclusive cuttable designs
  • Power cable, USB cable
  • 8″ cutting mat
  • Cutting blade
  • $10 gift card to the Silhouette Online Store
  • Basic Instruction Guide

PLUS, I’m adding in my Intro To Your CAMEO class for free!
a Rafflecopter giveaway

Posted in Blog, Latest How-To's | Tagged , , , , , , | 55 Comments

nikki in stitches raw edge applique tutorial Raw Edge Applique {Sewing Tutorial}

Today we’re talking raw edge appliqué, and I’m sharing a step-by-step tutorial for my super simple technique that I use for almost all of my appliqué projects. (If you missed the first part of this post, where I shared my how-to for creating your own appliqué designs without drawing a thing by hand, you can find it here!)

And we’re just going to jump right in, because I know many of you are excited to get to the fun of actually turning your drawings into fabric!

Note: Our little ice cream cone that we’ve been playing with would make the cutest quilt! Just make a bunch, all with different “flavored” ice cream, on 12″ x 12″ blocks, and then sew the blocks together. Couldn’t be easier…or more yummy to look at!

As always, if there are any questions, just comment here or drop me an email!

[email protected]

Enjoy,

Nikki, In Stitches

Materials:

  • Steam-A-Seam 2 (This is my personal favorite double sided fusible to use, but you can use whatever brand you like. I like Steam-A-Seam because it’s easily found in almost all craft stores. There, you’ll typically find it sold in 5 packs of 9″ x 12″ sheets. You can sometimes even find it at our your local quilt shop sold on a roll, where you can pay by the inch, just like you do for fabric, but again any double sided fusible will work!)
  • Background fabric
  • Fabric scraps for your appliqué pieces (Fabric choice for appliqué is important! Let your fabric print do a lot of the work for you! You’re design will have more dimension, and you won’t have as much detail embroidery work to do afterwards.)
  • Iron and ironing board
  • Sewing machine and basic sewing supplies

Directions:

  • Trace the mirror image of your individual applique shapes onto the paper liner of your fusible webbing. A few important notes here:
    1. Some people like to create templates from mylar sheets. I do that only when I’m planning on making a lot of the same design. In this case, since I was just making one appliqué, I just put my design on a lightbox and traced it right there on to the webbing.
    2. Be sure you’re tracing the mirror image! The fusible gets ironed to the back of your fabric, so you need to draw your designs in reverse. If you’re using mylar templates, just simply flip them over before tracing! If you’re using a lightbox like I did, just flip your whole design over before you trace! It’s not hard to do, just easy to forget to do it!
    3. Refer to the manufacturer’s instructions on your fusible if you have any questions. Most come with step-by-step instructions for transferring your designs to the product!
  • Cut out the appliqué pieces from the webbing, leaving a generous 1/2′ all the way around. DO NOT cut out the exact pieces!
  • Iron the fusible webbing to the back of your fabric.
  • Now cut out the exact appliqué shapes!
  • Remove the paper liner and iron your first appliqué shape in place. (Note: Since our pieces overlap some, I press one at a time, then sew that piece down, before moving on to pressing the next piece!)
  • Sewing very close to the edge, stitch all the way around your first piece. You do not need to sew where the piece will be overlapped by the next piece. (Slow down! You’ll be happier with your appliqué if the curve of your stitches matches the curve of the piece as closely as you can get it. Be sure both your needle and presser foot are both down. Stop your machine. Lift your presser foot and adjust your fabric accordingly. Sew the next stitch. Repeat as many times as necessary to get a nice smooth curve!)
  • Move on to your next piece by pressing it in place, and then again, stitching very close to the edge, all the way around. (If you need help with the placement of your pieces, you can put your drawn design on a lightbox and place your fabric overtop!)

  • After all of your individual shapes have been pressed to the background fabric and sewn into place, add any embroidery details that you’d like! (That’s how I added the stem to my cherry! It’s just a simple back stitch. After all the machine sewing was complete, I again put my design on a lightbox, with the appliqué overtop. I very lightly traced the stem with a pencil, then just stitched right over it!)
Posted in Blog, Fabric, Latest How-To's | Tagged , , , , , , , , | 8 Comments

how to create your own applique designs without drawing a thing by hand from nikki in stitches How To Create Your Own Appliqué Designs Without Drawing A Thing By Hand

Last week’s appliqué baby bib sent my inbox into quite a tizzy!

There were lots of questions regarding my tips for finding appliqué designs online, requests for a more detailed tutorial on how to sew them, and even a few inquiries about making your own bias tape.

So I thought I’d take some time over the next few weeks to cover all of that, and more.

We’ll start with a two-part post on creating and sewing appliqués.

I’m going to go more into depth as to how I find shapes to work with online (I may be a seamstress, knitter, and paper lover, but I am by no means an artist!). Then, later in the week, I’ll give a step-by-step how-to for sewing raw edge appliqués, and all of this will be from scratch…no cutting system required!

Up first, creating your own appliqués….

As I said above, I am surely no artist. Drawing with a pencil by hand is probably one of my weakest crafty skills. So, I turn to basic shapes that can be found online, for free, to help me create my own appliqué designs.

I thought I’d walk you through my process today, with a basic shape…an ice cream cone!

So, the first thing I did to create the appliqué shown above was a google search of the phrase “ice cream cone coloring page.” Of course, tons of images came up, none of which I loved 100%. That’s what’s great about this technique! I’m going to show you how I pick and choose which parts of each I like, and how I put them all together.

Back to that ice cream cone…

These two images caught my eye (Take a peek at my notes on each as to what I liked, and what I didn’t! You can click on the image to make it larger!):

So I kept the pieces I liked (and took away what I didn’t!) by simply printing these images out, and tracing the parts I wanted to keep! You can use a lightbox, or even just tape the print out to a window, then put a blank piece of paper overtop. Super simple!

Plus, I googled “free cupcake clipart images” to find that missing cherry! Here’s what I was left with, and again, take a peek at my notes!

To resize the individual pieces, I just ran them through my printer, and either reduced or enlarged them accordingly.

Put all the pieces together by tracing them one more time….

And that’s it! You’ve got an adorable appliqué ice cream design, ready to be cut out and stitched (again, we’ll cover that part in the next post!) and, as promised, it was created without drawing a thing by hand! Super simple, right?

I’d love see what designs all of you can come up with using this technique. Please feel free to experiment, and then send your creations my way! Just email them to [email protected]

Enjoy,

Nikki, In Stitches

PS…The make your own bias tape tutorial is in the works, too! No worries! Look for that coming soon!

NOTE: This appliqué is made by combining individual parts of free images found online. It is for personal use only. If you’re going to sell your finished product, or benefit financially from its creation, you should contact the individual websites where the images are found, and review their copyright policies.

Posted in Blog, Fabric, Scraps, Thread | Tagged , , , , , , , , , | 2 Comments