You can thank me now…or later…whatever’s easiest for you.
I know…I just gave you the perfect gift for that person that you were thinking “I really should get them something, but I don’t know what…I wish I could make them something…I don’t have a lot of time, so something simple…something cute, that I know they’d like.” (I know you’ve had this conversation in your head at least once this past week!)
Enter…this cookie jar.
And it takes like 10 minutes…now you really need to thank me!
Hint…If you love the star that totally puts this little project over the edge, I would also become a subscriber. You’ll have it just in time to put on your cookie jar…and everyone will think you are the craftiest!
Materials:
Glass Cookie Jar (I picked mine up at my local chain craft store for just a few dollars.)
Stencils (I made my own…see directions below.)
Craft Knife
Cutting Mat
Temporary Spray Adhesive
Glass Etching Cream (Again, I picked up a small bottle of Armour Etch…that will be more than enough.)
Paint Brush
Cookies!!
Directions:
1. Make Stencils
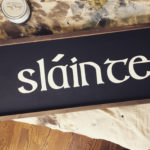
If you look closely at the picture, you can see I have two stencils that I used on my jar. The first is the “M,” which I just printed out from my computer (in Brush Script font, size 350), and then carefully cut out with a craft knife on my cutting mat. The second, which is harder to see, is a snowflake. This is simply just a punch that I had in my arsenal of craft supplies.
2. Adhere Stencil and Etch
Using the temporary spray adhesive, adhere your stencils to your jar, being sure to really get them down securely so that no etching cream spreads underneath them. Follow the manufacturer’s instructions for the actual etching process. For me, it pretty much went: glop it on, then wait for it to dry. (The directions actually said to put on a thick coat, brushing in all directions, then allow to dry for 5 minutes.) When the etching cream was ready, I just took it over to the sink, and with water and a soft cloth, wiped off the stencils (since they are made from just printer weight paper, they almost dissolve in the water), and the dried etching cream, and project complete!
Here’s one more pic to remind you of how cute it is!
Enjoy…(and you’re welcome!),
Nikki, In Stitches
PS…What will you fill these with??
Here are two yummy suggestions:
A recipe for my great-grandmother’s butter cookies…they are the best!
Martha Stewart’s Peppermint Bark…I’ve made this in the past, it’s really easy, and it is one of my faves!
Added later: Want the directions to the origami star??
Take a look in this post: Origami Stars!


Annmaree says
Thats totally awesome Nikki! You rocked this!
You could totally use the cutout peice let over from a die-cut to use as a stencil for that too!
I do LOVE that star and desperately want to know how to make one!!!
You could even go smaller, and just make candy jars, And Sugar Almond cinnamon almonds would go great too, or any flavoured or candied nut!
You’ve given me so many ideas!!!
judi says
thank you. what a wonderful idea. i can’t wait for my craft store to open. the perfect presentation for the candies i have made.
Kelly McGonigal says
Great idea, Nikki! I was planning on baking cookies for coworkers but couldn’t come up with a festive way to package them. Perfect!